
Choosing the right beam angle is one of the easiest ways to improve an outdoor lighting project without changing the wattage or adding more fixtures. The beam angle controls how widely light spreads from a fixture, where the strongest light lands, how much overlap is needed, and how much light may spill into areas the customer did not intend to illuminate. For an importer or distributor, this decision also affects the product range, quotation, sample approval, and customer support process.
Many buyers begin with a simple question: should I choose a narrow, medium, or wide beam? The useful answer is more specific. The correct outdoor LED lighting beam angle depends on the target object, the distance from the fixture, the mounting height, the desired visual effect, the surface material, and the amount of uniformity required. This guide explains the decision in plain language so you can discuss beam options with a factory and recommend a reliable configuration to your customers.
Why beam angle matters in wholesale buying
A product can have excellent lumen output and still perform poorly when its beam is wrong for the application. A narrow beam placed too close to a wall may create a bright hot spot and leave the surrounding surface dark. A wide beam used on a small tree may waste light on the lawn instead of highlighting the trunk and canopy. In both cases, the problem may be blamed on the fixture even though the real issue is the optical choice.
Beam angle also affects the number of fixtures needed. A wide distribution can cover more area, but it may produce lower intensity at the target. A narrow distribution can reach farther and create stronger accents, but several fixtures may be required for a large surface. When you compare wholesale quotations, check the beam and the intended application together. Comparing price and wattage without comparing optics can lead to an unfair and expensive decision.
For distributors, beam angle is a sales and service issue as well as a technical issue. Your team should be able to explain why a 15-degree optic is useful for a tall tree, why a 36-degree optic may suit a planting bed, and why a broad wall wash often needs a different distribution from a small spotlight. Clear advice builds trust and reduces returns caused by customers ordering a visually attractive but unsuitable model.
What does beam angle actually mean?
Beam angle is the approximate spread of light from a fixture, normally measured across the part of the beam where the intensity remains above a defined level. In simple terms, a smaller number creates a tighter beam and a larger number creates a wider beam. The same fixture body may be available with different lenses or reflectors, so the beam angle should be written as part of the product configuration, not treated as a minor accessory.
Beam angle is not the same as total brightness. Lumens describe the amount of light produced, while beam angle describes how that light is distributed. A narrow beam with fewer lumens can look brighter on a small target than a wide beam with more lumens, because the light is concentrated into a smaller area. For a professional comparison, ask for the beam angle, candela or intensity information, photometric file, and the measured output of the exact LED and optic combination.
Also remember that the visible result is influenced by distance. As a beam travels farther, the illuminated area becomes larger. A rough planning rule is that the diameter of a round beam increases with distance, although the exact edge and shape depend on the optic. This is why a beam that looks perfect in a sample room may need a different angle when the same fixture is installed several meters away in a garden or on a facade.
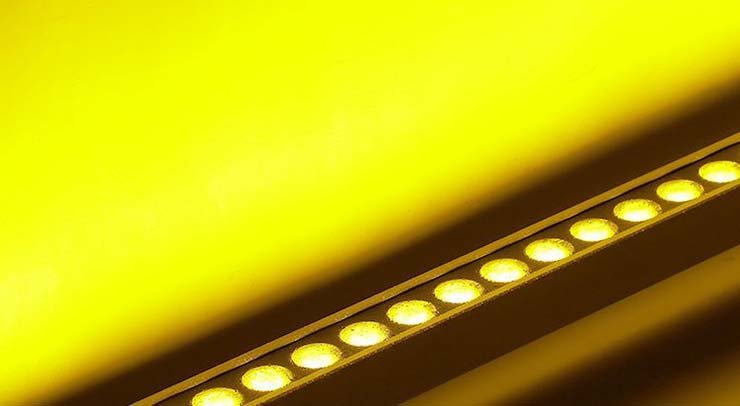
Beam spread changes the balance between intensity, coverage, overlap, and spill light.
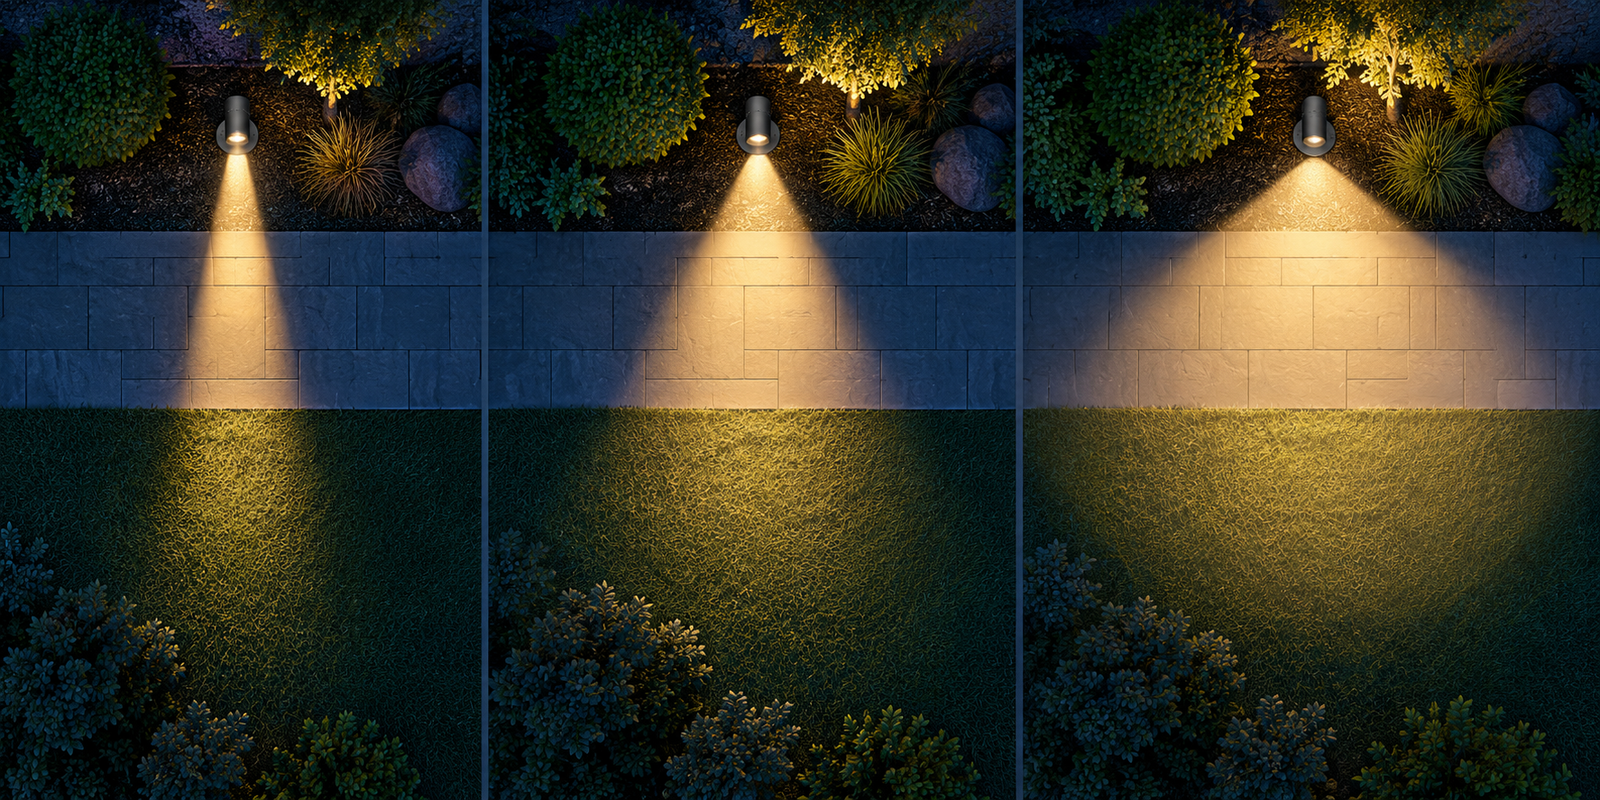
Beam spread changes the balance between intensity, coverage, overlap, and spill light.
Common beam angle ranges and their best uses
The ranges below are practical buying categories rather than universal rules. Different manufacturers may classify optics slightly differently, so always confirm the actual photometric distribution before a large project.
| Beam type and range | Recommended use and buying note |
|---|---|
| Narrow 5 to 20 degrees |
Best for: Tall trees, statues, columns, signs, and distant accents. Check: Strong intensity, accurate aiming, and glare control. |
| Medium 20 to 45 degrees |
Best for: Small trees, planting beds, paths, entrances, and general accents. Check: The balance between reach, coverage, and overlap. |
| Wide 45 to 90 degrees |
Best for: Walls, broad planting areas, courtyards, and low mounting positions. Check: Uniformity and spill light at the edges. |
| Very wide 90 degrees and above |
Best for: Open areas, low-level general lighting, and close wall coverage. Check: Useful light on the target and comfortable glare levels. |
| Asymmetric Varies by optic |
Best for: Wall washing, linear paths, facades, and directional spread. Check: The full beam shape, not only one angle number. |
| Adjustable Variable |
Best for: Product ranges, prototypes, and changing layouts. Check: Locking, repeatability, service needs, and price impact. |
Five factors to check before selecting the optic
1. Identify the target object
Start with what the customer wants people to see. A tree, sculpture, entrance, sign, low planting bed, retaining wall, and driveway each need a different visual treatment. For a tall narrow object, concentrated light usually creates a cleaner result. For a broad surface, a wider distribution or an asymmetric wall-wash optic may be more appropriate. Ask whether the goal is a focal point, a comfortable path, a continuous facade effect, or general orientation light.
2. Measure the distance and mounting position
The distance between the fixture and the target is often more important than the product photo. A spotlight positioned close to a tree may need a wider beam to cover the canopy. The same tree viewed from a far planting bed may need a narrower beam to keep enough intensity at the top. Record the fixture position, target height, target width, and likely aiming angle before making a recommendation.
3. Consider the target width and desired overlap
Uniformity normally requires some overlap between neighboring beams. A path with evenly spaced fixtures may need a beam that joins smoothly with the next pool of light. A wall wash may need overlapping beams to avoid dark vertical gaps. Accent lighting may intentionally use less overlap because contrast is part of the design. Ask the customer whether they want a continuous, even effect or a series of separate highlights.
4. Review surface color and texture
Light behaves differently on pale stone, dark brick, rough concrete, glossy tile, foliage, and water. Light surfaces reflect more light and can reveal uneven hot spots, while dark surfaces absorb more light and may require stronger intensity or closer spacing. A textured wall can look attractive with grazing light, but a broad wall wash may be better when the customer wants an even appearance. A sample test is valuable when the finish is important.
5. Check glare, spill, and the surrounding environment
A technically efficient beam can still create an uncomfortable project if it shines into a window, a road, a seating area, or a neighboring property. Ask whether the fixture has a visor, shield, louver, snoot, or aiming adjustment. In a hospitality or residential project, glare control may be more important than maximum output. When comparing products, include the optical accessories and not just the lamp body.
Match the beam angle to the application
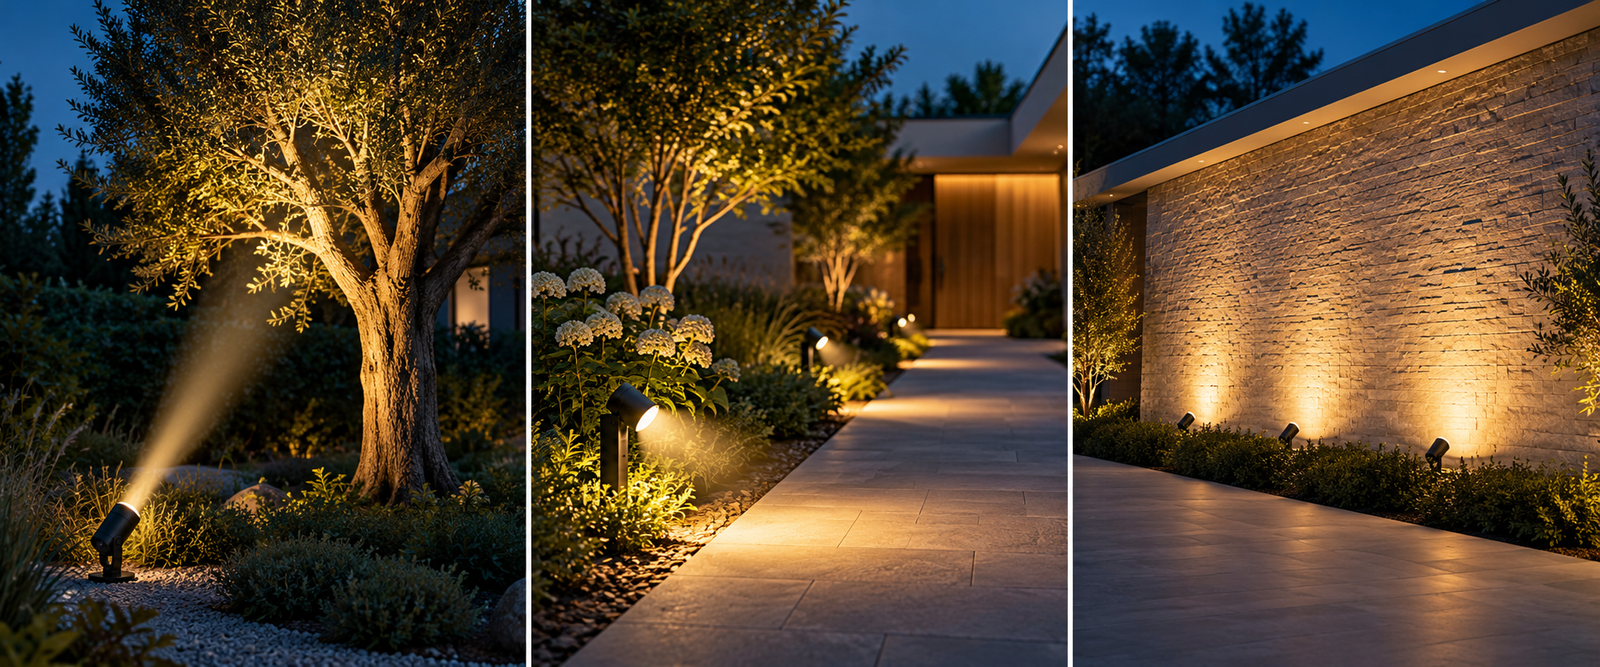
The same product family may use different optics for trees, walkways, and broad walls.
Trees and large plants
Trees are three-dimensional targets, so the best optic depends on height, canopy width, trunk texture, and fixture distance. A narrow beam is useful for a strong vertical accent on a tall trunk or a compact canopy. A medium beam is often easier to use on a small ornamental tree because it gives more tolerance when the branches move or the installer cannot aim perfectly. For wide canopies, several medium fixtures may create a more natural result than one very wide fixture placed close to the trunk.
Paths, steps, and planting beds
Path lighting usually needs comfortable coverage instead of a dramatic hot spot. A medium or wide beam can reduce dark gaps between fixtures, but the mounting height and fixture spacing must be considered together. For steps, aim the light so it supports visibility without shining directly into the eyes of people walking up the stairs. In planting beds, check that the beam lights the plants rather than producing bright patches on the paving.
Walls and facades
Wall lighting is where a simple beam-angle number can be misleading. A small wall may work with a medium spot, while a broad facade often needs a wall washer, an asymmetric optic, or several fixtures with controlled overlap. The distance from the wall changes the visual pattern: placing a fixture close creates grazing texture, while moving it farther away can spread light more evenly across the surface. Ask for a photometric file or a real sample before promising a uniform finish.
Signs, columns, and architectural details
Small architectural details normally benefit from a controlled narrow or medium beam. The aim is to make the detail readable without lighting the entire surrounding area. For signs, consider the sign width, mounting distance, viewing direction, and whether the customer needs an even face or an intentional highlight. For columns, vertical height and spacing between columns can determine whether one narrow beam or several overlapping medium beams look better.
How to use photometric data in a practical way
Photometric data is helpful when the project is large or the customer needs a predictable result. Request IES or LDT files for the exact model, wattage, CCT, LED package, and optic. Do not use a file from a similar-looking fixture without checking the configuration. A change in lens, LED board, driver, or output can change the distribution and the calculated spacing.
For a simple wholesale recommendation, you may not need a full lighting simulation. You can still use the data to compare the beam shape, peak intensity, useful reach, and approximate coverage at the planned distance. For a hotel, public area, facade, or large landscape project, offer a more complete calculation or ask the factory to support the design. This reduces the risk of selling a product that looks correct on paper but produces an unsatisfactory site result.
Questions to include in your factory RFQ
- What beam angles are available for the exact model and wattage?
- Is the stated angle based on a measured photometric test or a lens description?
- Can the factory supply IES or LDT files for each optic?
- Does changing the optic change lumen output, CCT appearance, or glare?
- Are visors, snoots, louvers, and anti-glare accessories available?
- Can the optic be changed or locked after aiming?
- Will the same beam and LED configuration be available for future reorders?
- What sample distance and installation height does the factory recommend for approval?
Common beam-angle mistakes importers should avoid
- Choosing the widest beam because it appears to cover more area, without checking useful intensity.
- Choosing a narrow beam only because it looks brighter in a showroom.
- Comparing beam angles from different manufacturers without checking how they measured them.
- Ignoring the distance between the fixture and the target.
- Using one optic for trees, paths, walls, and signs simply to reduce the number of SKUs.
- Approving a sample indoors and never testing it at the real outdoor distance.
- Forgetting glare control when the fixture is close to people, windows, or roads.
- Allowing a lens or reflector substitution without updating the specification and sample record.
A simple buying checklist
Before you finalize an outdoor LED lighting beam angle for a wholesale project, write down the target, distance, mounting height, target width, surface material, desired uniformity, glare risk, and expected quantity. Then ask the factory for the exact optic, measured output, photometric file, accessories, and sample recommendation. Keep the approved beam angle in the product name or SKU description so the sales team does not accidentally quote a different lens on the next order.
For a distributor, a small number of well-defined optics is usually better than a confusing catalogue full of poorly explained choices. Build a clear range with a narrow accent option, a medium general-purpose option, and a wider or asymmetric option for broad surfaces. Add adjustable products only when the extra cost and service requirements make sense. This approach keeps inventory manageable while still giving customers a useful solution for common applications.
Request a beam-angle recommendation
If you are sourcing outdoor LED lighting for a wholesale project, send us the target application, fixture-to-target distance, target size, expected quantity, and destination market. Konlight can help you compare beam options, photometric files, samples, and production configurations before you place the order.



Leave A Comment